I've decided to make a small batch of beaded beads to include in a bracelet I've got planned. I've always loved the way the Cellini spiral looks, with its undulating surface, and I also love how quickly it stitches up once you get your beads set up. I use a paint palette to keep them organized...
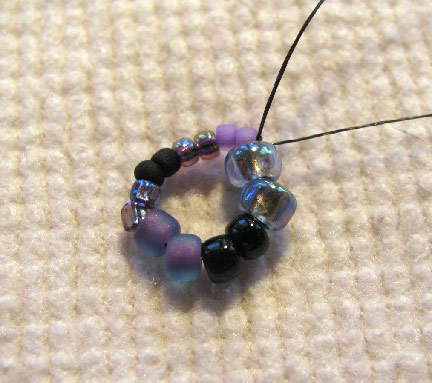
1. Choose your beads and set them up in pairs in a circle. I used 4 pairs of size 11/0 seed beads, 2 pairs of size 8/0s and 1 pair of size 6/0s. This is the perfect number to go around a 1/4 inch (outer diameter) piece of vinyl tubing (find it at your local hardware store). You will also need size 15/0 seed beads to finish each end. You can use other sizes and counts if you wish.
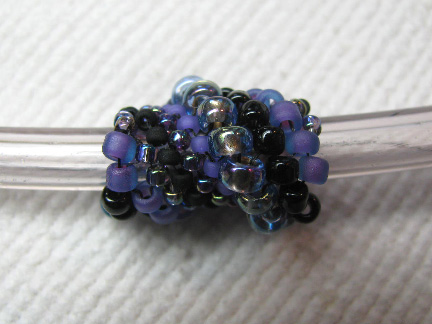
2. The "rules" for Cellini spiral are simple. Pass your working thread through the first two beads (for me it will be the small purple ones at the top), and pick up one of the same bead just exited. Pass through the second bead in each following pair, and pick up the same bead just exited. In this way, you will be doing peyote stitch all around the circle and shifting the color and size of the beads by one step each time. At the end of the circle, you will need to step up to start the next round, but that's the only thing even remotely tricky about the stitch.
I used the vinyl tube as an armature, not really because it was needed for structure, but because I plan to use these beads with some wirework, and I thought it would make it a bit easier to work with them later, and protect the glass and threads from the metal.
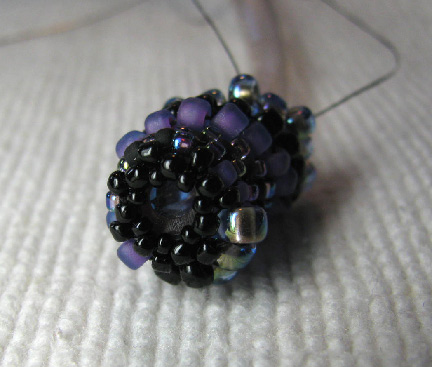
3. When your bead is as long as you'd like it, stitch 2 rows of peyote stitch with all size 11/0s and 2 rows with all size 15/0s to cinch the beadwork in over the tubing. The work shown above is missing the final row of size 15/0s so that you can see the opening a little better. Trim the other end of the tube close and repeat this step on that end of the beadwork.
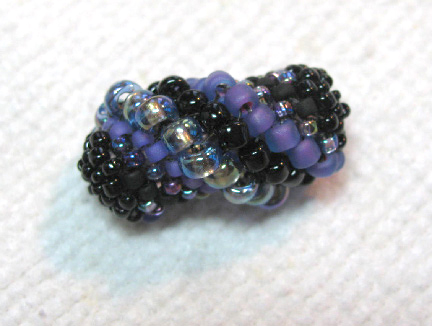
4. These beads are capable of keeping their shape without the tubing inside, but because they twist a bit, it really does make it a lot easier to thread them onto a project if you include it. Plus, it's so inexpensive at the hardware store!
Here is the link for the wire bracelet that features these beaded beads!
This post contains affiliate links: Beadaholique
Copyright 2016 Cyndi Lavin. All rights reserved. Not to be reprinted, resold, or redistributed for profit. May be printed out for personal use or distributed electronically provided that entire file, including this notice, remains intact.


Comments